Tutorial: Fedora 17 Linux Installation
In this tutorial, I provide a step-by-step walkthrough of Fedora 17 installation using the 64-bit version of the Fedora 17 Desktop Edition image. The installation of the 32-bit operating system will be the same as this guide. I will try to explain certain options and provide helpful hints along the way, so rather than just following the guide, you can understand the reasoning behind the decisions.
If there are any mistakes please draw my attention to them and I will correct as needed. I have tried to make this as simple as possible, whilst covering the vast majority of scenarios users will come across whilst installing this operating system.
Step 1
The first thing you should do is head to Fedora’s website and download using your preferred method the Fedora 17 Desktop Edition CD ISO image. The disc image used in this guide is the Fedora 17 x64 Live Desktop ISO.
Step 2
Using your disc burning software, burn the .iso you downloaded to a CD.
Step 3
Before you go any further, ensure all important data is backed up in case of data loss on your drives. This guide assumes you have media backups of your hard drives and you are safe to proceed.
warning: installing another operating system without first ensuring you have backups of your current files and operating system is a big risk. If you have no data to lose or you’ve backed up important data, you’re ready to proceed. YOU are responsible if you lose data.
For those of you using Windows, and installing Linux for the first time I recommend you either use a separate hard disk that does not contain the Windows OS, or create a partition big enough for Linux within Windows using Disk Management in the Administrative Tools menu of the control panel. 20GB of hard disk space is absolutely plenty of space for you to begin exploring Fedora whilst at the same time having room to grow.
Info: it goes without saying, that I accept no liability or responsibility for any errors or damage to your computer during, or after installing Linux. It is up to the user to ensure proper backups are made of important documents and files and this tutorial assumes these have already been done and verified.
Step 4
Ensure you have a network cable connected, restart your computer, and boot from the CD drive.
Step 5
The CD will begin to load up, starting the Fedora 17 installation. Once loaded you’ll be presented with the following box:
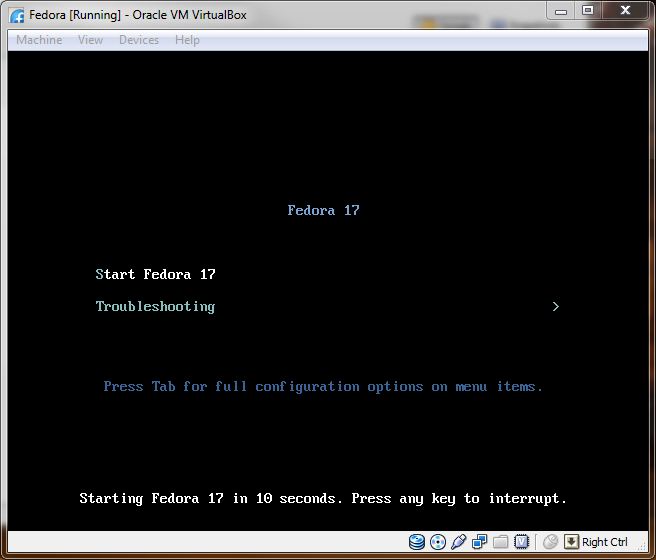
Using the arrow keys on your keyboard select “Start Fedora 17” option and hit the return key.
Step 6
The installer will then load up the live desktop environment, after a short while you will be presented with the following box:
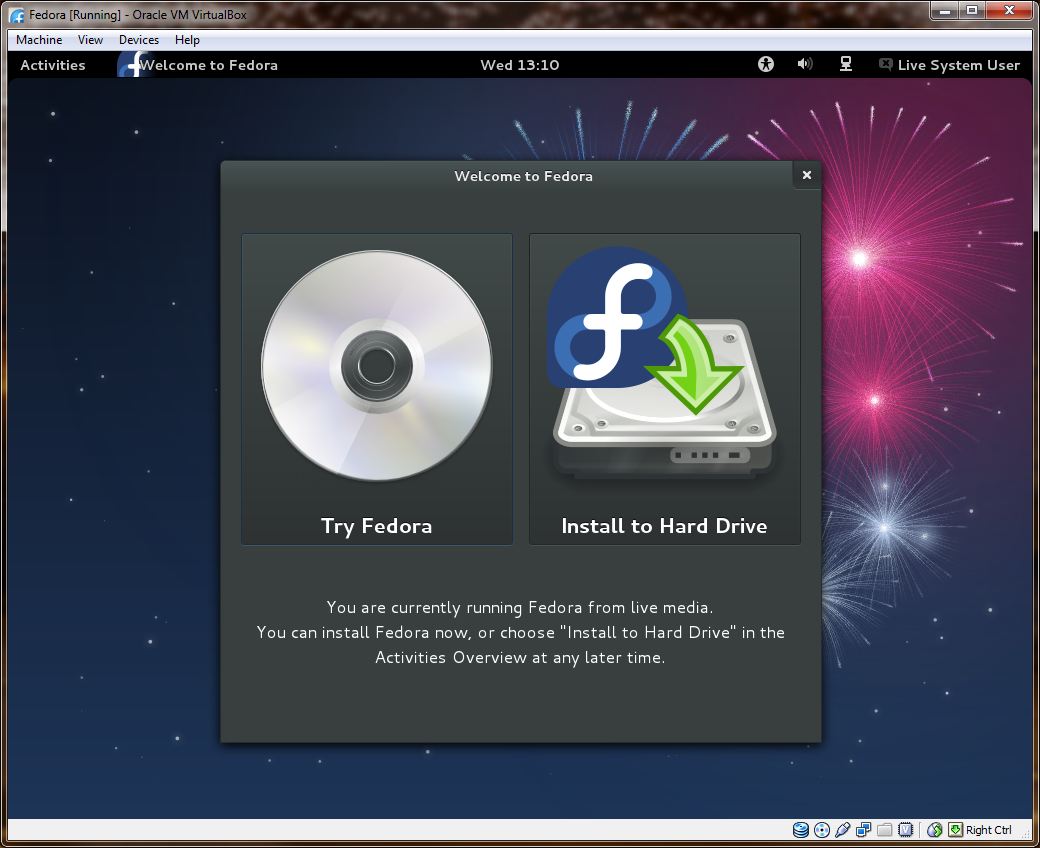
For the purposes of this guide, we will assume that you are going to install the operating system, so click “install to hard drive” to begin the Fedora 17 installation.
Step 7
At the next screen you will be asked to select the most appropriate keyboard for your location, as below:
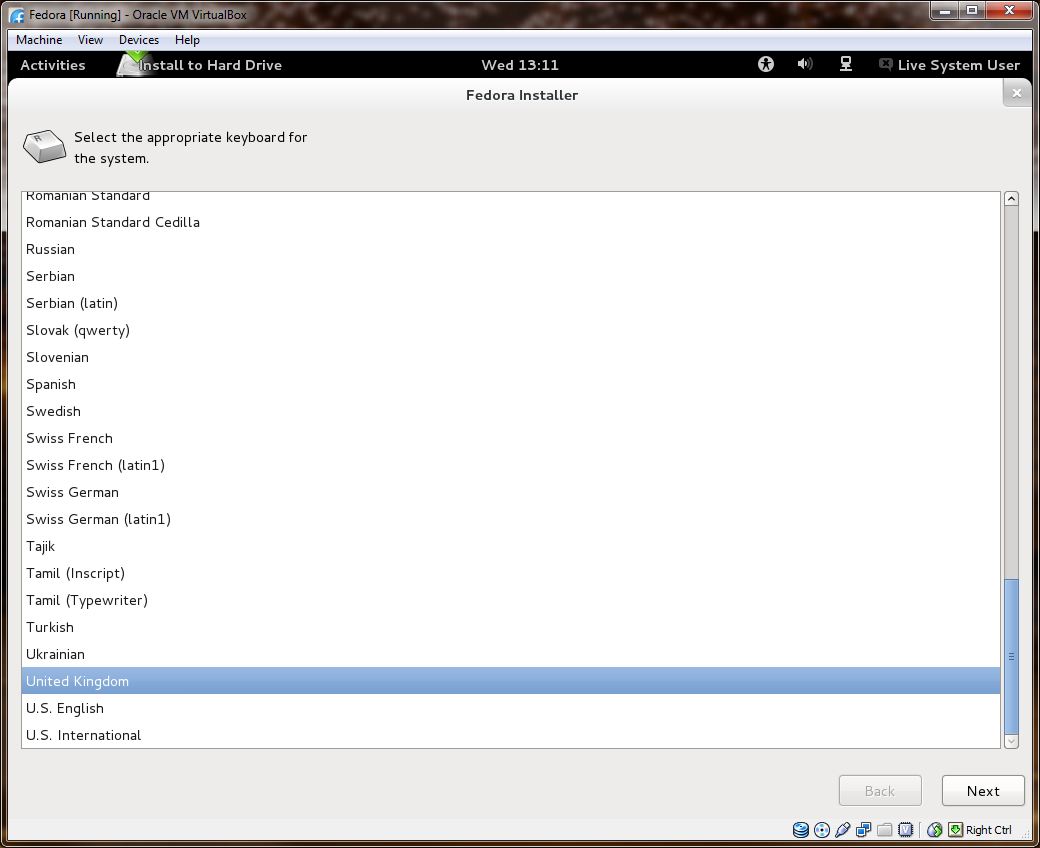
Select your keyboard and click “next.”
Step 8
The next screen will ask you if you wish to include specialised storage devices, or install using regular storage devices, as below:
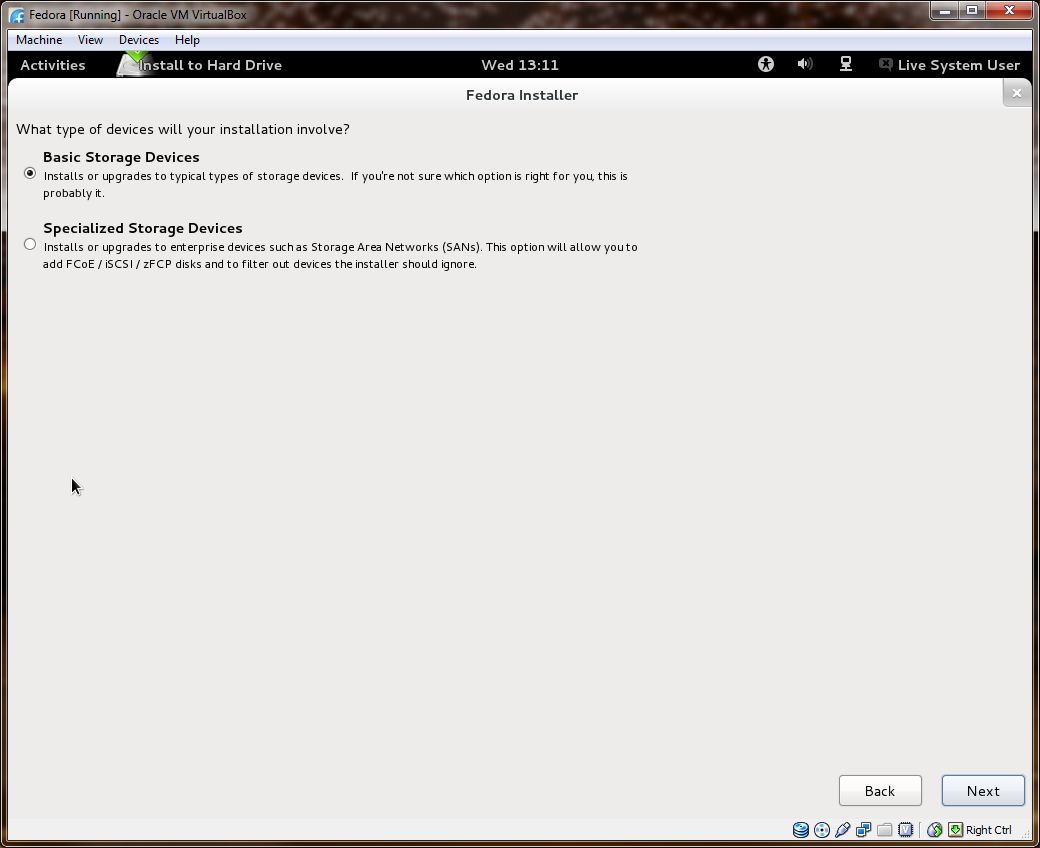
We will be setting up the Fedora 17 installation to the computer’s hard disk, so ensure “basic storage devices” is selected and click “next” to move to the next step.
Step 9
As the hard disk utility inspects the available disks it may under certain circumstances display a warning, as seen below.
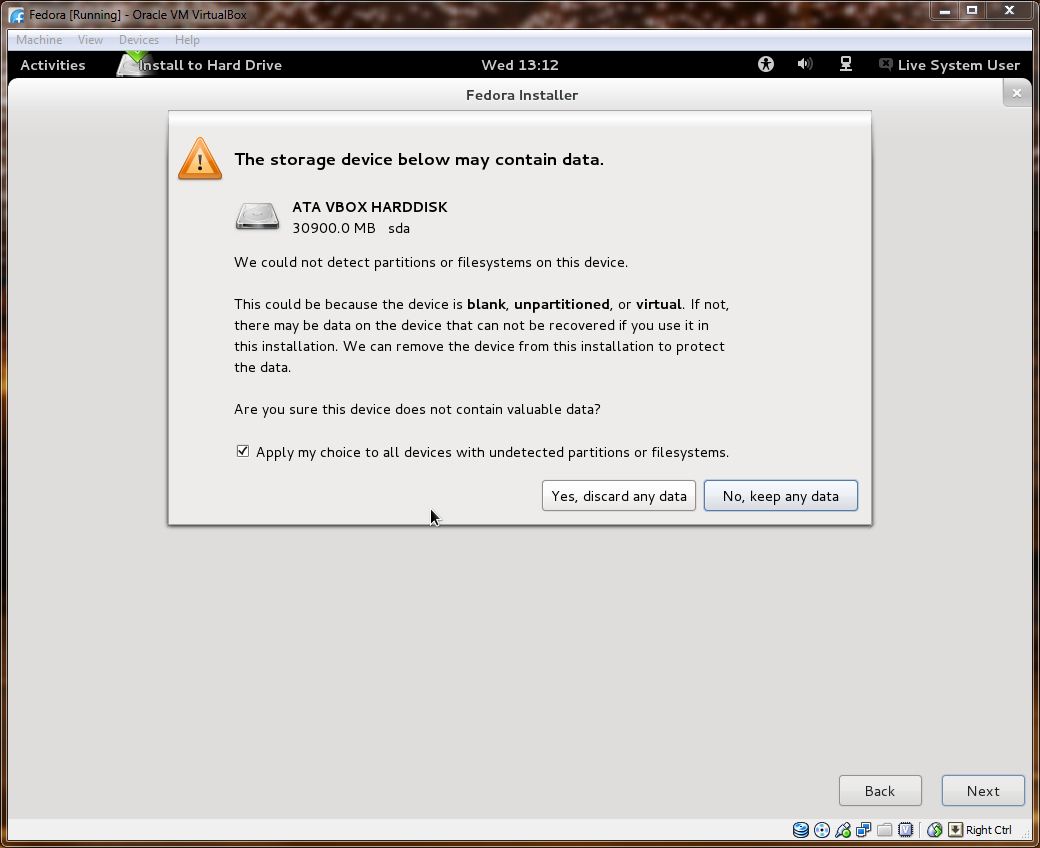
Once you have confirmed whether to discard any data or keep it, the disk utility will move onto the next step.
Step 10
The Fedora 17 installation media will then be asked to name the computer, as below:
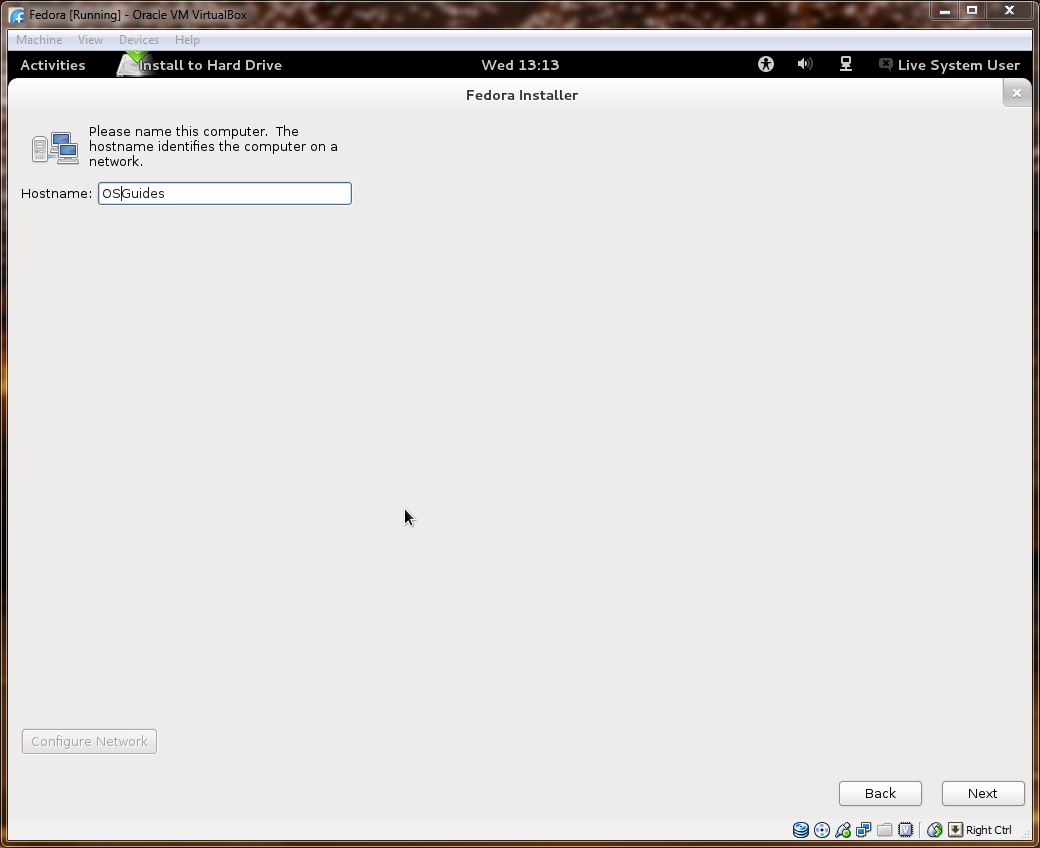
The name can be whatever you would like to name your computer on the network. For most home users you can enter any value here. For those installing Linux to integrate with existing commercial networks consult your Systems Administrator for further clarification.
Once you have entered the name you wish to use, select “next.”
Step 11
The next step is to select the nearest city to set the correct time zone for your computer.
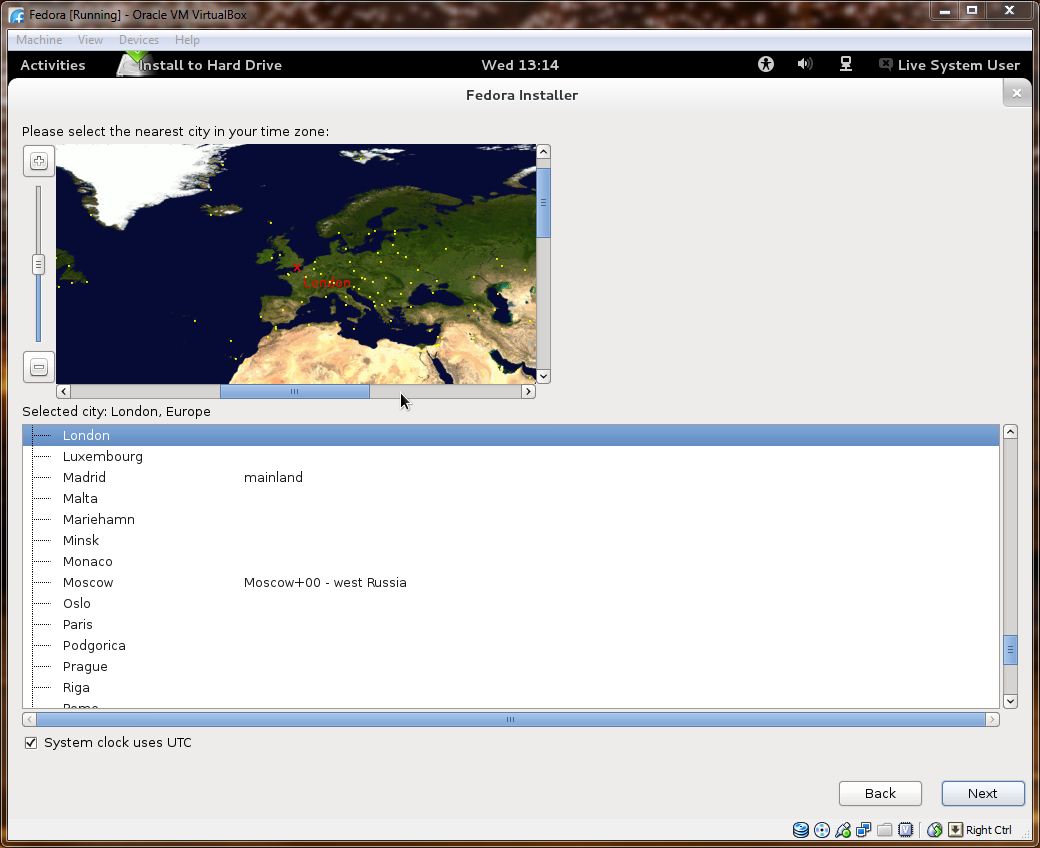
Select the correct timezone from the list of available cities, then click “next” to continue.
Step 12
The Fedora 17 installation media will then progress to the next step and asks you to type a password for the root user, as below:
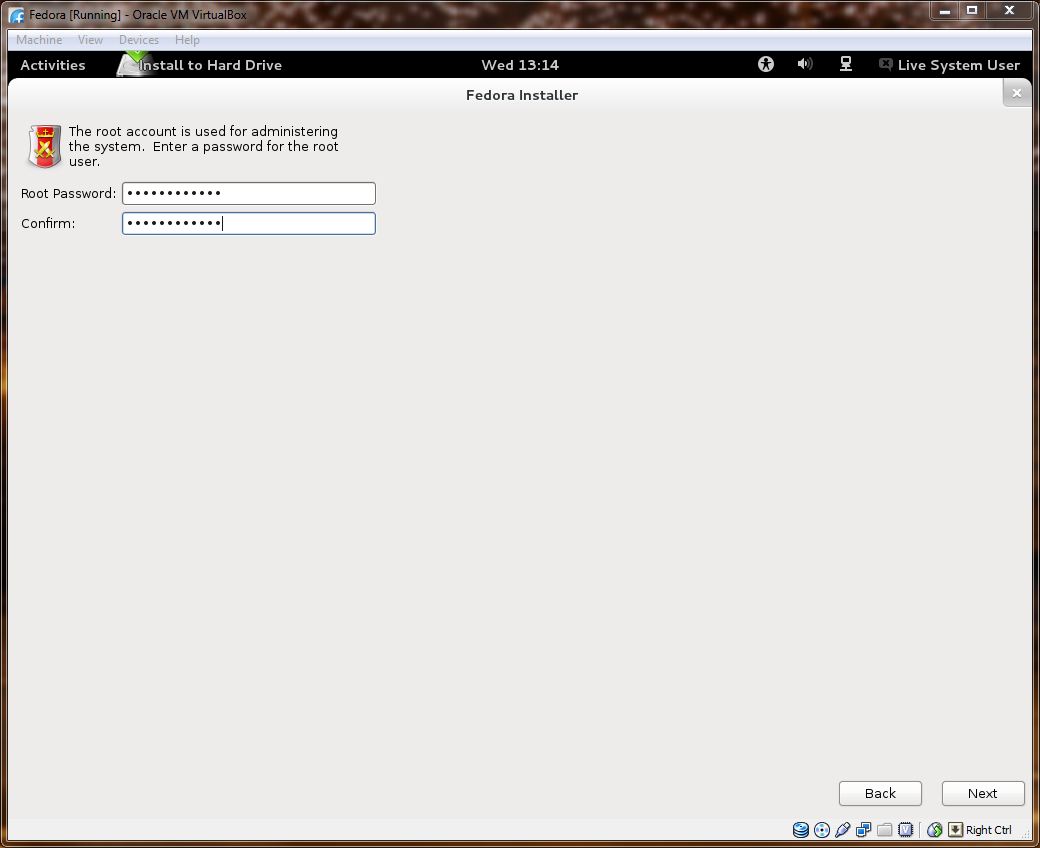
Enter the password you would like to use for the root account, and click “next.”
Info: the admin password is not the same as the user password. This password is used in order to elevate user permissions in order to perform certain tasks as the administrator in Linux. Even in a single user installation of Linux this password should be unique and not used by another user account for security reasons.
Step 13
The installer will then present you with the following choices for the Fedora 17 installation:
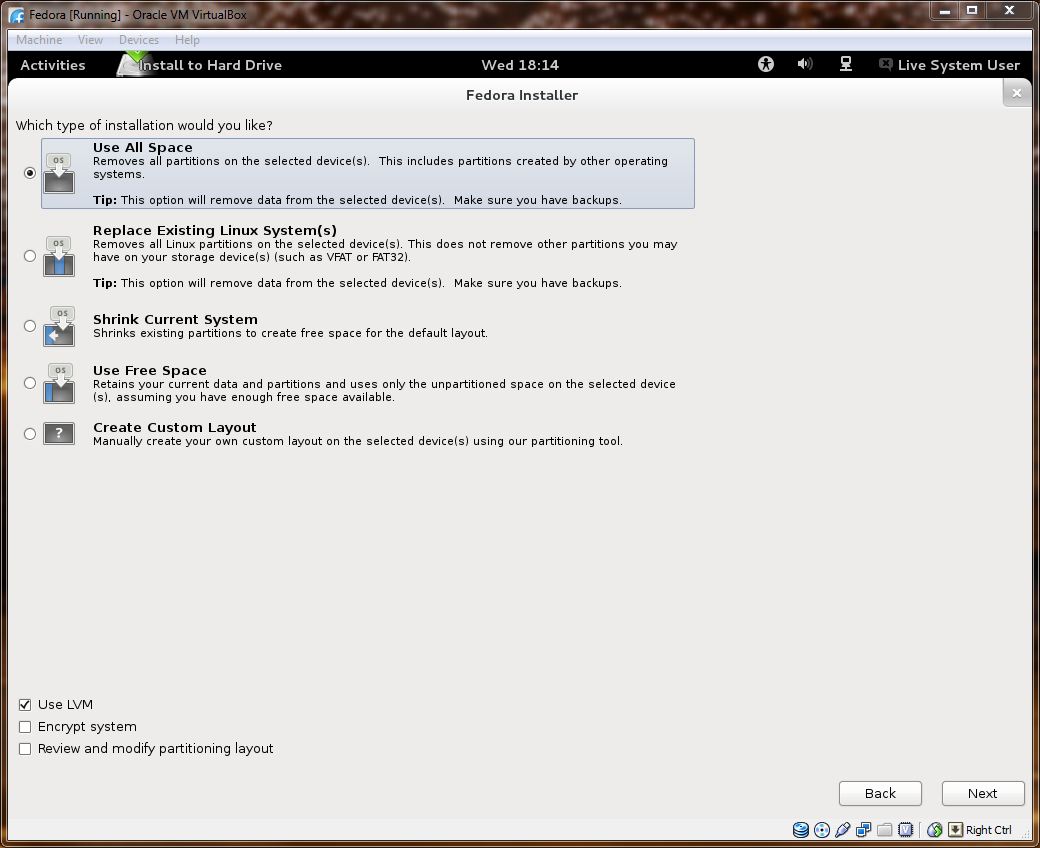
You have five main choices, and these are listed as per the image above. There are also a further three options available regardless of what type of installation you choose:
- Use LVM — by default this is enabled. Logical Volume Managers provide greater flexibility with hard disk management as well as the ability to add further disks and extend existing partitions in a more flexible manner than traditional solutions.
- Encrypt system — this is disabled by default. Selecting this option will enable you to encrypt each partition’s data using a strong password and is ideal should sensitive data be stored on the computer.
- Review and modify partitioning layout — this is disabled by default. Selecting this gives you the option to make further changes to partitions.
For the purpose of this tutorial we’re going to assume you’re running the Fedora 17 installation to a clean hard disk, or for the first time in a virtual machine. So Select “use all space” and click “next” to continue.
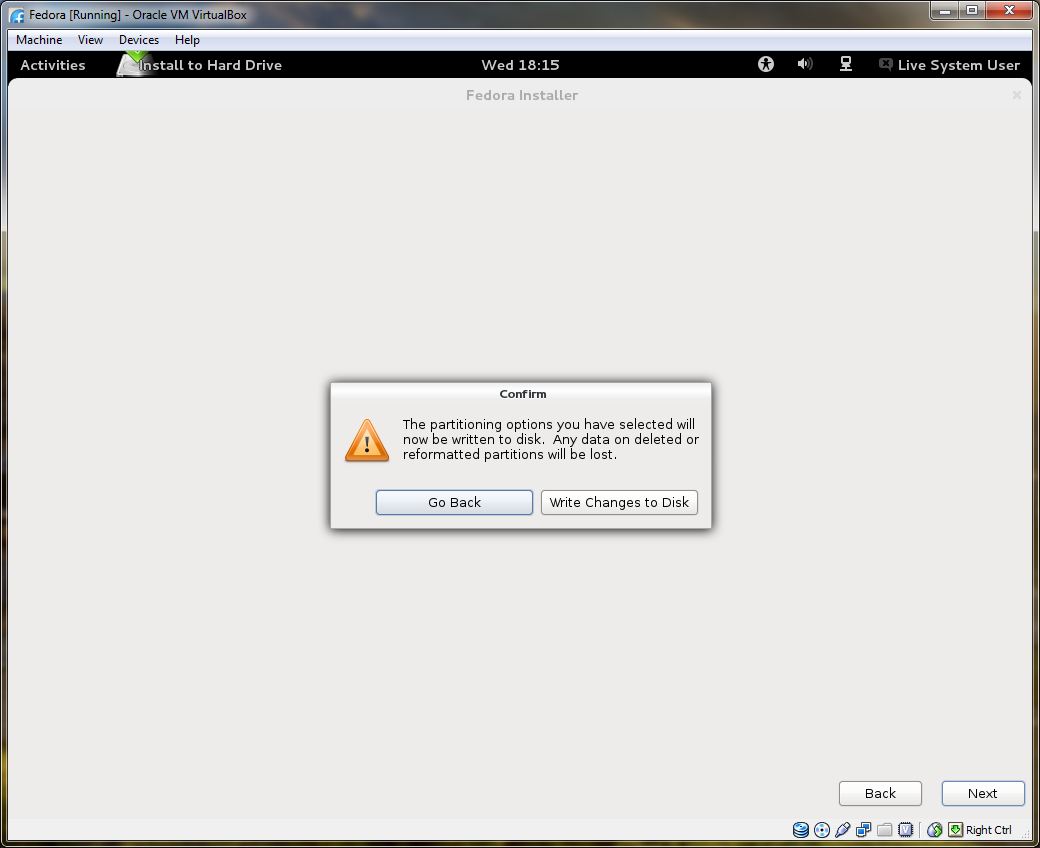
You will then be asked to confirm that you wish to write the changes to the disk.
Warning: this is the last point in which you can abort the installation without permanent data loss to drives. Please ensure you have working backups before proceeding further.
The partitions will then be written to the disks, and the operating system will be installed to the hard drives.

Once it has completed this, you’ll see the following screen:
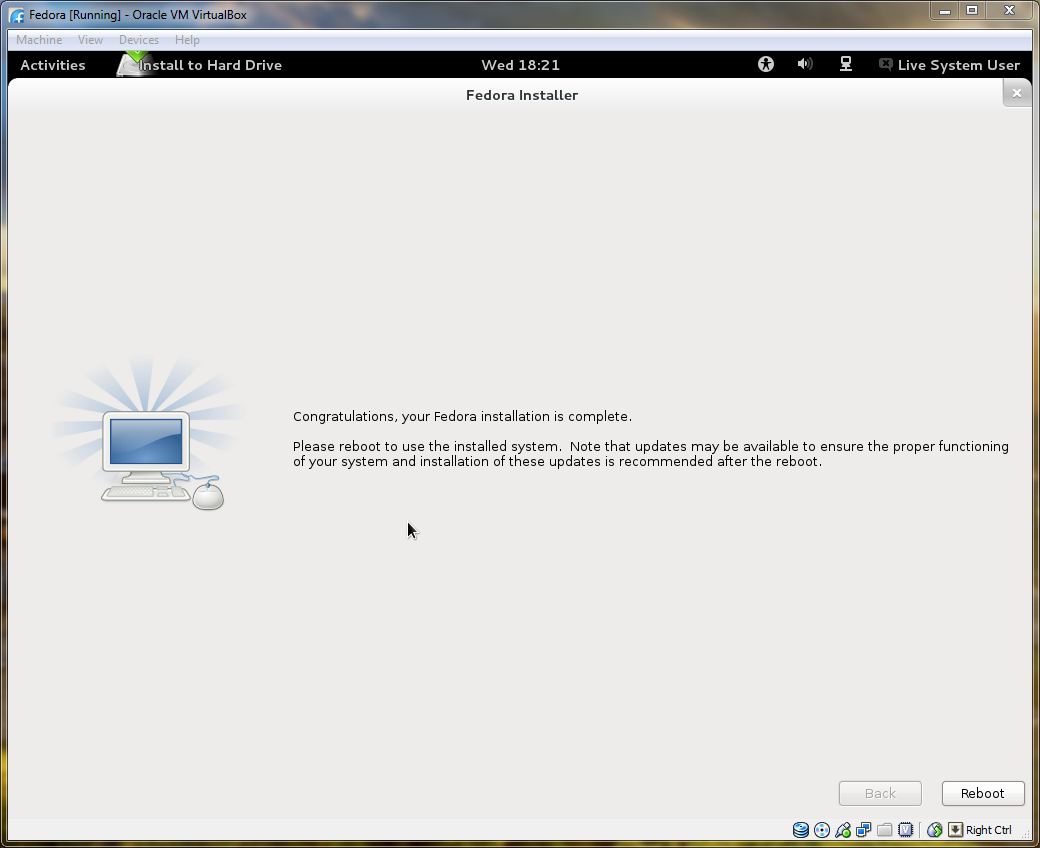
The installation of core files for Fedora 17 is now complete. Click “reboot” to restart your computer and run the first initial configuration utility.
Step 14
Fedora 17 will launch using the hard disks, and once loaded you’ll see the following:
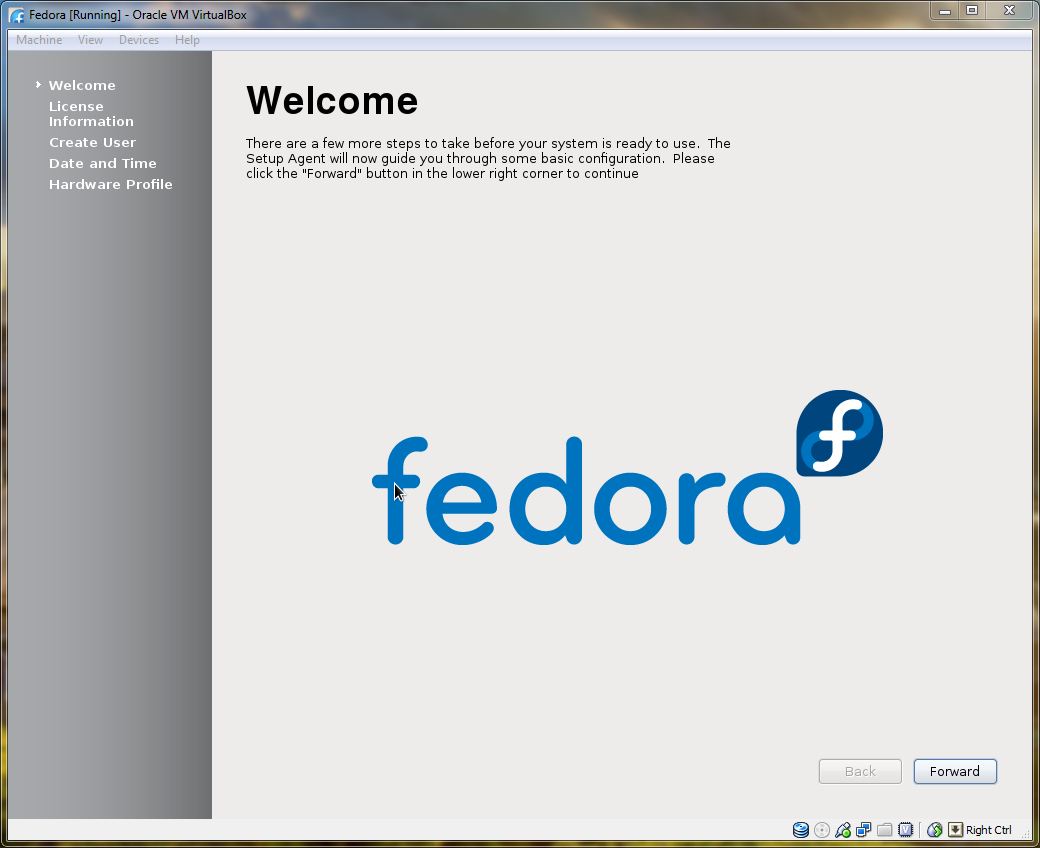
Click “forward” to begin configuring Fedora 17.
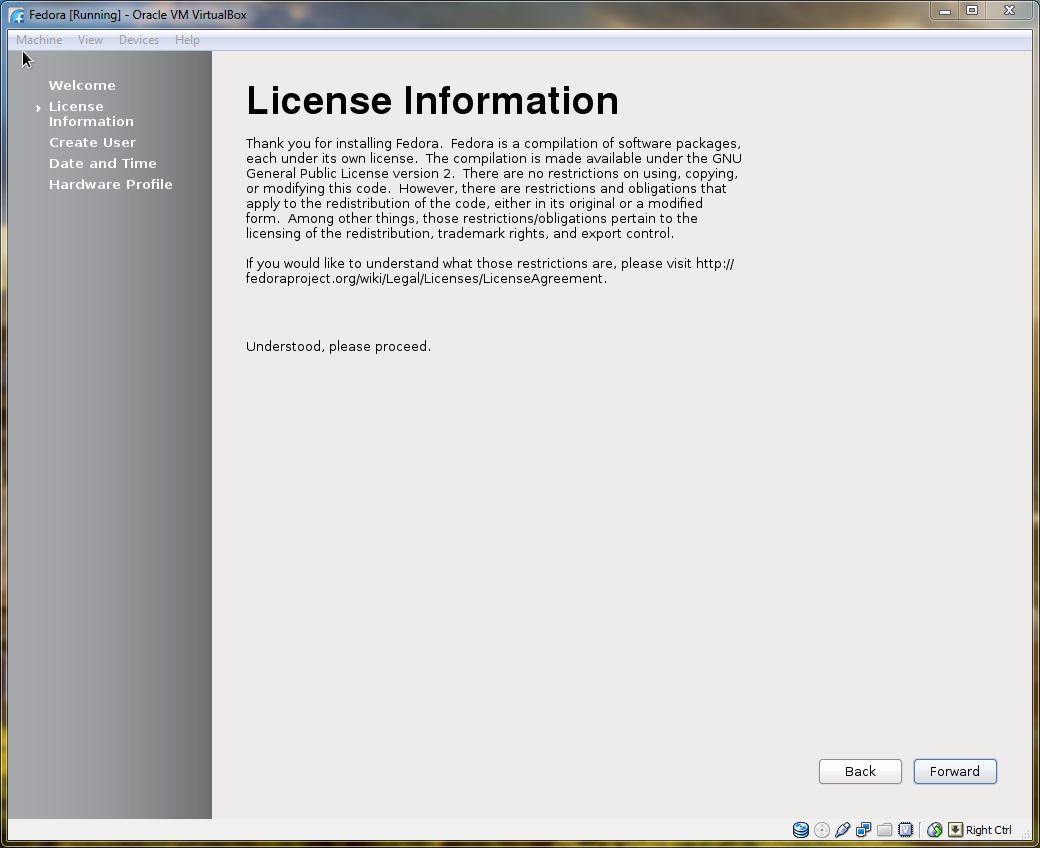
Read the license information and click “forward” to proceed, and agree to the license terms.
Step 15
You will now be asked to fill in the information and password for the first user account, as below:
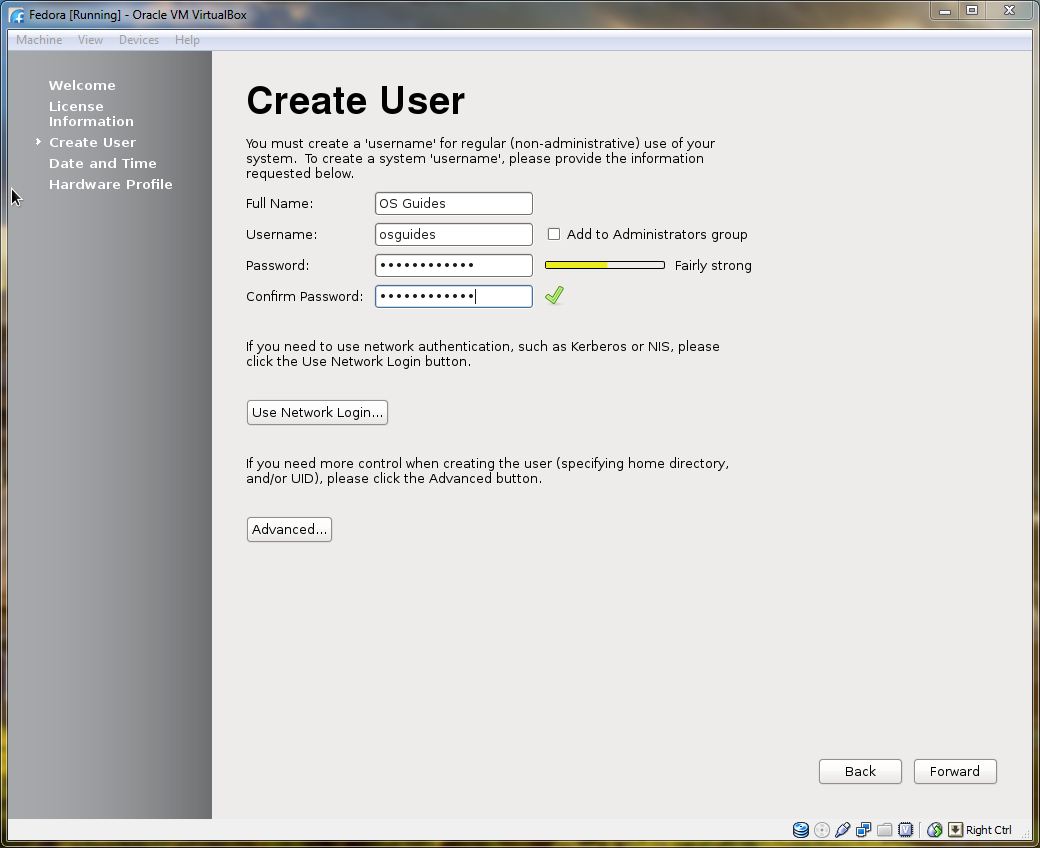
Fill in the name, username and password fields and then click “continue” to proceed to the next step.
Step 16
You will then be asked to confirm the current date and time, and whether you wish to synchronise it automatically.

Make any changes as necessary and click “forward” to move to the next step.
Step 17
The final screen you will see generates your hardware profile, and asks if you wish to send it to Fedora.
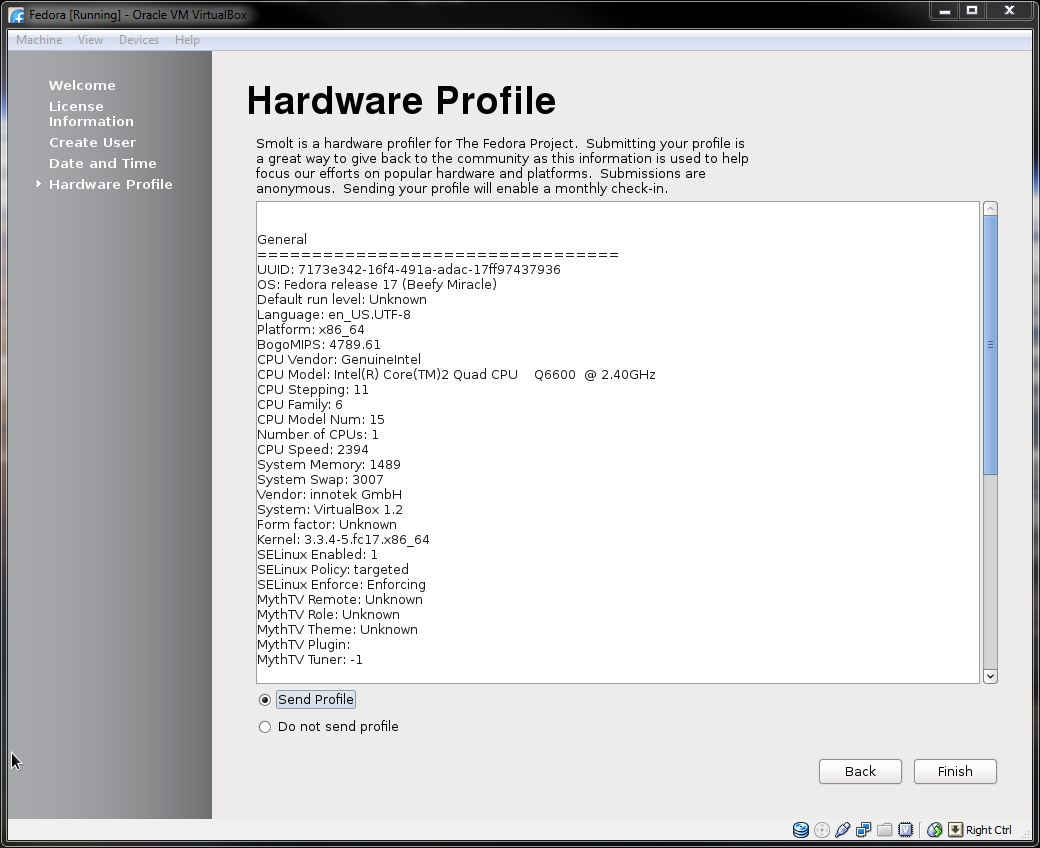
By default the response is set to “do not send profile” but given that the information is anonymous and used to help shape future releases of Fedora Linux its worth sending if you’re comfortable doing so. Select whichever option you prefer and click “finish” to finalize the settings and reboot Fedora.
Step 18
Once loaded, you will be greeted with the following log in window.

Enter your password and log in, and your desktop will load up as below:
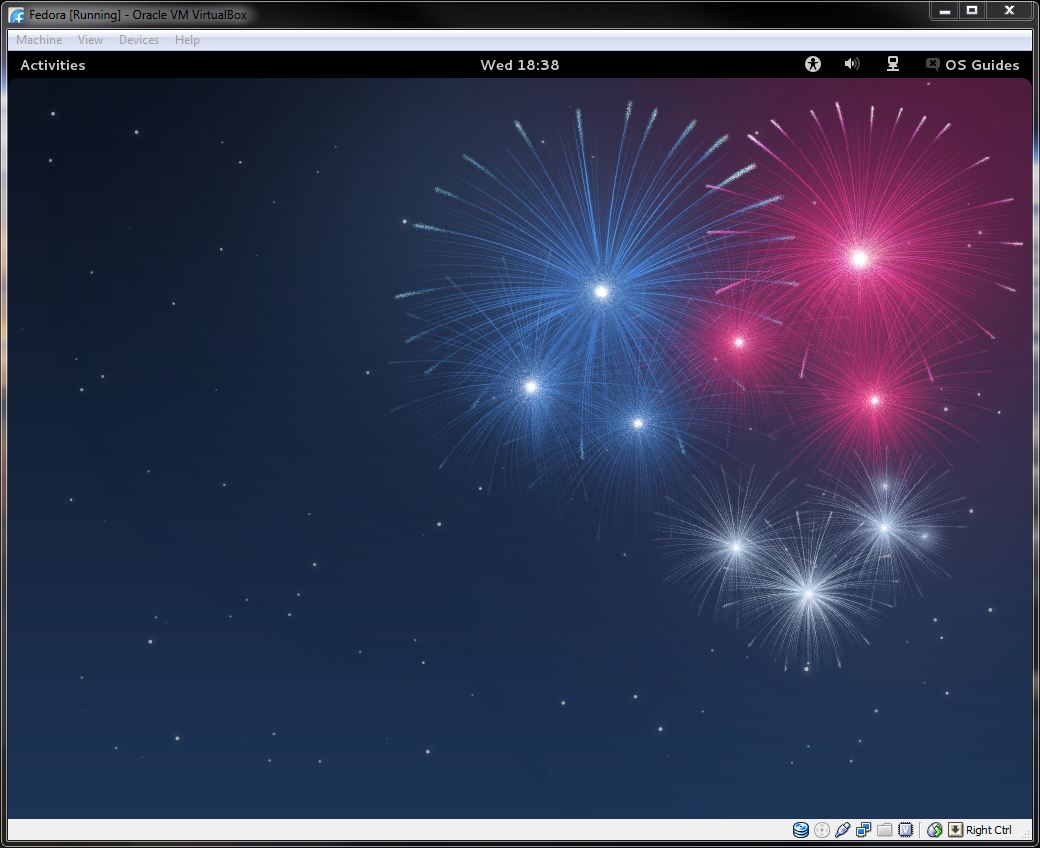
Now you can enjoy your new OS and begin exploring its features.
Feedback and comments are welcome. If you feel something is missing or you would like to see something in particular covered in future tutorials let us know in the comments section, or contact me directly.